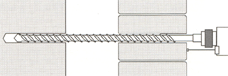
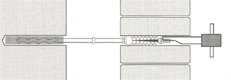
| 1.)
Drill either a 10mm or 12mm diameter hole through the masonry to a depth
of 55mm in the inner leaf. Remove all dust and debris from the hole. |
|
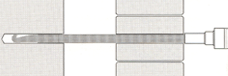
| 2.)
Inject a quantity of Resin into the inner leaf hole, via a resin extension
tube. |
|
| 3.)Insert
the wavy tail end of the tie into the resin and push firmly home. When the
resin has set, a pull test can be undertaken. Details of resin setting times
are published in the Resin data sheets. |
|
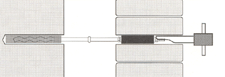
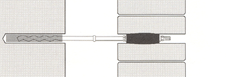
| 4.)The
mechanical outer leaf expander can now be tightened to the specified torque
setting using the appropriate fixing key. |
|
| 5.)Make
good the hole with matching mortar or mastic. |
|
|
| Availability: |
Resin
Mechanical:
Wavy Tail / Neoprene
Wavy Tail / Stainless Steel
Wavy Tail / Brass
Anular Ring / Neoprene
Anular Ring / Stainless Steel
Anular Ring / Brass
Standard Lengths (200mm & 213mm)
Ex Stock - 3/4 days delivery
Standard Diameters Available - 10mm and 12mm
|
|
| Packing: |
| 100
per box / 500 per outer box. |
|